
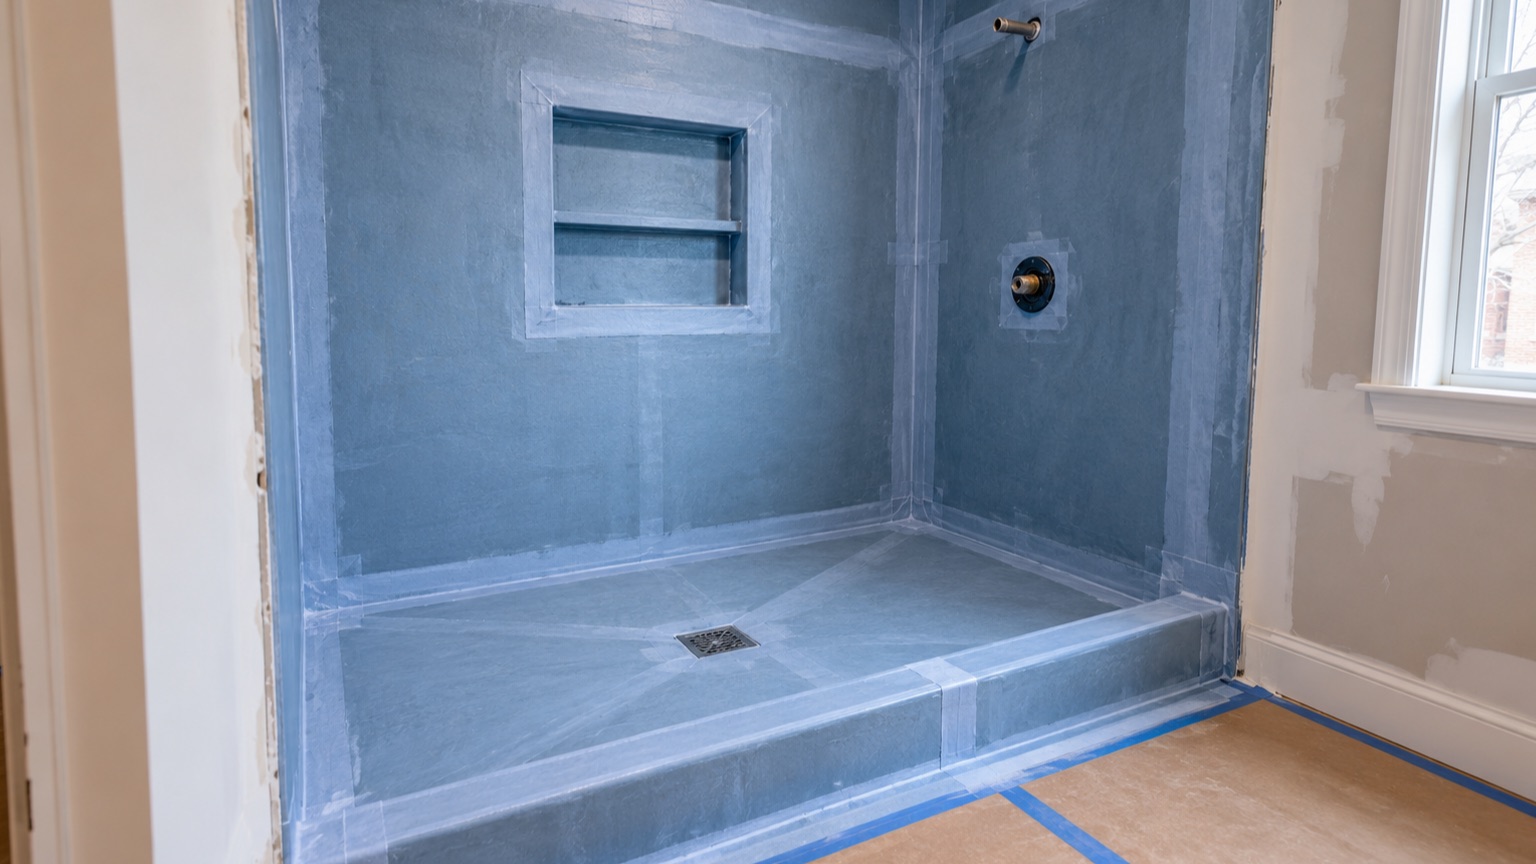
Treat the Shower as One System
The drain, sloped base, waterproofing layer, walls, corners, curb or entry, niches, benches, penetrations, and transitions must work together. Combining unrelated products without an approved detail can create gaps between otherwise good materials.
Ask which system is being used, where it begins and ends, and how changes of plane and penetrations will be treated. Follow manufacturer requirements and the permitted project documents where applicable.
Confirm Slope and Drain Coordination
Water needs a continuous path to the drain. Drain type and position affect framing, plumbing, floor preparation, tile layout, and the waterproofing connection. Linear drains, centered drains, curbless entries, and site-built bases require different coordination.
Do not choose floor tile only by appearance. Size, format, texture, and layout need to work with the required slopes and intended use.
Detail Niches, Benches, Curbs, and Windows
Every interruption adds corners and transitions. Confirm the size and placement of niches before rough plumbing so they do not conflict with pipes or controls. Review how benches, curbs, glass supports, windows, and door openings will be integrated without compromising the water-management layer.
Document Before Tile Covers the Work
Photographs can provide a useful record of the completed preparation and concealed plumbing. Any testing or inspection should follow the selected system, project specifications, and applicable requirements. Resolve visible damage or incomplete transitions before tile begins.
Protect the Finished Assembly
Later trades should avoid puncturing waterproofed areas. Glass, accessories, and grab bars require planned attachment and blocking details. Sealants and movement joints should be installed in the locations appropriate to the assembly rather than treating grout as the answer everywhere.
Ask to See the Layers Before They Disappear
Homeowners do not need to become waterproofing installers, but they should know what system was specified and when it can be reviewed. Ask the contractor to identify the drain connection, wall treatment, floor treatment, corner details, and approved sealants. Product names alone are not enough; the important point is whether the parts form one compatible assembly.
Photographs should show the full shower, not only close-ups of product labels. Include the curb or entry, niche, bench, valve wall, drain, and transitions to the bathroom floor. Keep those photos with the product information and project documents.

Curbless Showers Need Whole-Room Planning
A low or curbless entry affects more than the shower door. The team must coordinate framing or slab conditions, drain position, floor slope, bathroom-floor height, tile format, waterproofing limits, and the direction water may travel if the drain is briefly overwhelmed.
In an older Chicago home, existing joists and uneven floors can limit how much the assembly can be recessed. In a condo, structural rules and work in the ceiling below may narrow the options further. Confirm feasibility before selling the household on a perfectly flush transition.
Do Not Leave Glass and Accessories Until the End
Shower glass affects curb width, wall alignment, door swing, blocking, and penetrations. Grab bars, fold-down seats, handheld shower mounts, and heavy accessories also need planned support. Mark these locations before the walls are closed so installers are not searching for framing through finished tile.
Some glass layouts can use attachment methods that reduce penetrations into horizontal waterproofed surfaces. The glass contractor and tile installer should agree on the detail before the curb and wall finishes are complete.
A Useful Pre-Tile Walkthrough
Before setting tile, look for a continuous, undamaged assembly. Review corners, seams, fasteners, plumbing penetrations, niche edges, curb transitions, and the area where the shower meets the main floor. Confirm that the drain is protected and that later work will not bury debris in it.
This is also the right time to review tile layout. Centerlines, cuts, niche shelves, valve locations, and edge trim can expose a mismatch between the design and the prepared substrate. Correcting the substrate before tile is far cleaner than disguising a problem with narrow pieces or excessive sealant.
Warning signs worth pausing for
Pause and ask questions if different systems meet without a documented transition, if fasteners or cuts remain untreated, if a niche or bench slopes toward the wall, or if the waterproofing has been damaged by later work. A question at this stage is inexpensive compared with removing finished tile.
Explore Chicago bathroom remodeling, plan a tub-to-shower conversion, or request an estimate.
Frequently Asked Questions
Are tile and grout waterproof?
They are finish materials. The assembly should include a coordinated water-management system behind or directly beneath the tile as designed.
When should shower niches be planned?
Before rough plumbing and framing are finalized, so their size and position can be coordinated with pipes, valves, studs, tile layout, and waterproofing.
Should waterproofing be photographed?
Yes. A visual record before tile can be useful for project documentation and future work.
Reviewed by the Budget Construction Company Editorial Team
Budget Construction Company has served Chicago homeowners since 1976. Project costs and requirements vary by property, scope, and municipality.